Water spots on basement walls, lingering musty smells, and puddles after heavy rain are signs your foundation may be letting in water. We’ve worked with plenty of homeowners who tried interior fixes first, only to have the problem come back. In cases like these, the real solution starts outside. Exterior basement waterproofing tackles water issues where they begin, along the exterior wall of your foundation.
In this post, we’ll walk through when this approach is needed, how the system works, and why it offers lasting protection for your home.
When Exterior Basement Waterproofing Is Necessary
Signs You Shouldn’t Ignore
We typically recommend exterior waterproofing for homeowners dealing with:
- Consistent water seepage after storms or snowmelt
- Efflorescence or staining on the basement walls
- Cracks in exterior foundation walls
- Mold growth or a persistent musty smell
- Hydrostatic pressure damage, where water forces its way through concrete
If you’ve already tried interior solutions like sealants or drains and the problem keeps returning, the issue is likely happening at the exterior foundation wall level.
Soil and Grading Problems
Homes with poorly graded yards, clay-heavy soil, or older foundation systems are more likely to suffer from outside water intrusion. When the soil around the home becomes saturated, it creates pressure that forces water against your basement walls. Over time, that pressure wears down your foundation materials and allows water to break through.
How Exterior Basement Waterproofing Works
Exterior basement waterproofing is a process designed to prevent water from ever reaching your basement. Here’s how we approach it step by step.
Step 1: Excavation Along the Foundation
We start by digging down to the footing around the home’s perimeter. This gives us full access to the exterior of your basement wall. For most homes, we excavate about 6 to 8 feet down, depending on the depth of the foundation.
Step 2: Cleaning and Repairing the Foundation Wall
Once exposed, we clean the wall and inspect it for cracks, gaps, or weak spots. If we find any, we repair them with hydraulic cement or another foundation-safe material. This step ensures the wall is ready for a full waterproofing barrier.
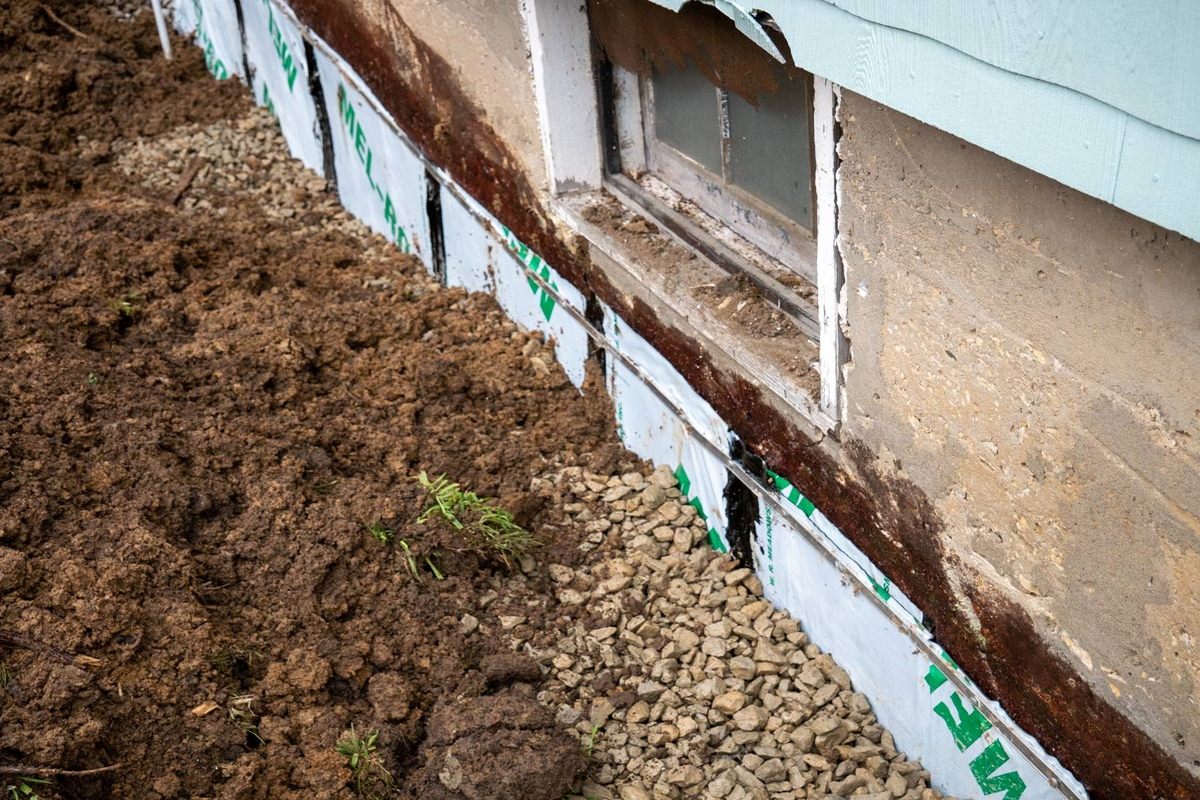
Step 3: Applying a Waterproof Membrane
Next, we apply a heavy-duty waterproof membrane to the entire wall surface. This could be a rubberized asphalt coating, elastomeric sheet membrane, or another long-lasting material rated for below-grade waterproofing. This membrane prevents water from penetrating the wall, even under extreme conditions.
Step 4: Installing the Drainage Board and the Drain Tile
To handle water that collects around the foundation, we install a drainage board over the membrane and lay a perforated drain tile system at the base. This drain tile sits alongside the footing and redirects water away from your home, usually into a sump pit or daylight outlet.
Step 5: Backfilling and Final Grading
Once everything is in place, we backfill with clean gravel and soil, then grade the surface to slope away from the home. This final step ensures surface water also drains away properly instead of pooling near the foundation.
Benefits of Exterior Waterproofing for Long-Term Protection
Stops Water Before It Reaches Your Home
The main advantage of exterior basement waterproofing is that it prevents moisture from entering in the first place. While interior solutions only manage water after it has already seeped in, exterior methods address the issue at its source.
Preserves Foundation Integrity
Over time, untreated water pressure can lead to foundation wall cracking, shifting, or bowing. Exterior waterproofing helps prevent these problems by relieving hydrostatic pressure and sealing the wall from moisture.
Improves Indoor Air Quality
A dry basement helps eliminate mold and mildew growth, which is critical for homes with finished lower levels or those storing valuables below grade. This is especially important for households with allergies or respiratory sensitivities.
Is Exterior Basement Waterproofing Always the Right Choice?
When Interior Systems May Be Enough
If your basement leaks are minor, happen only during certain seasons, or result from clear issues like clogged gutters or poor yard drainage, an interior drainage system may be a more cost-effective short-term fix. However, if you’re dealing with consistent moisture or have a finished basement, investing in a full exterior system can offer greater long-term protection and peace of mind.
What It Costs
Exterior waterproofing is more labor-intensive and typically more expensive than interior options, but it’s also more effective in severe cases. Prices vary based on the length of the wall, the depth of the foundation, and whether repair work is needed. We offer on-site evaluations to provide accurate estimates based on your home’s layout and condition.
Final Thoughts: Protecting Your Home with the Right Waterproofing Approach
Exterior basement waterproofing is one of the most reliable ways to keep water out of your basement for good. We walk homeowners through the entire process, from inspection to completion, and make sure every layer of protection is installed with care. If you’ve tried patching leaks and sealing walls from the inside without success, it might be time to address the problem where it starts, outside your home.
Need help figuring out the best waterproofing solution for your home? Contact us at KC Pier for a free inspection and customized plan that protects your foundation and keeps your basement dry, season after season.